Feature Update: Rearrange and Resize Tracks
A long‑requested improvement is now here: tracks can finally be moved directly on the map. In addition to reordering tracks through the track panel, you can now reposition any track simply by dragging its label. This provides the most natural and intuitive way to arrange tracks.
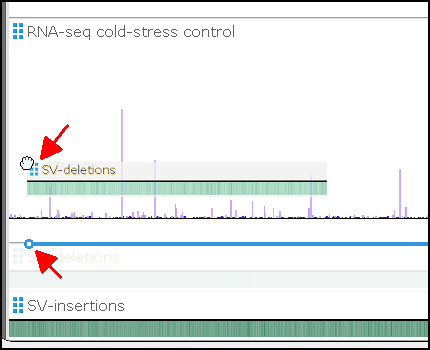
When you hover the mouse over a track label, the cursor switches to a hand icon to indicate that the track can be dragged. To prevent accidental movement while panning the map, dragging only becomes active after a brief 200 ms delay.
Sequence and ruler tracks now support this interaction as well, even though they do not display labels. Move your cursor into the label zone—the same side where other track labels appear, as defined in the application settings (left, right, or center). Pause there for a moment, and a small six‑square drag handle will appear. Once visible, you can reposition these special tracks just like any others.
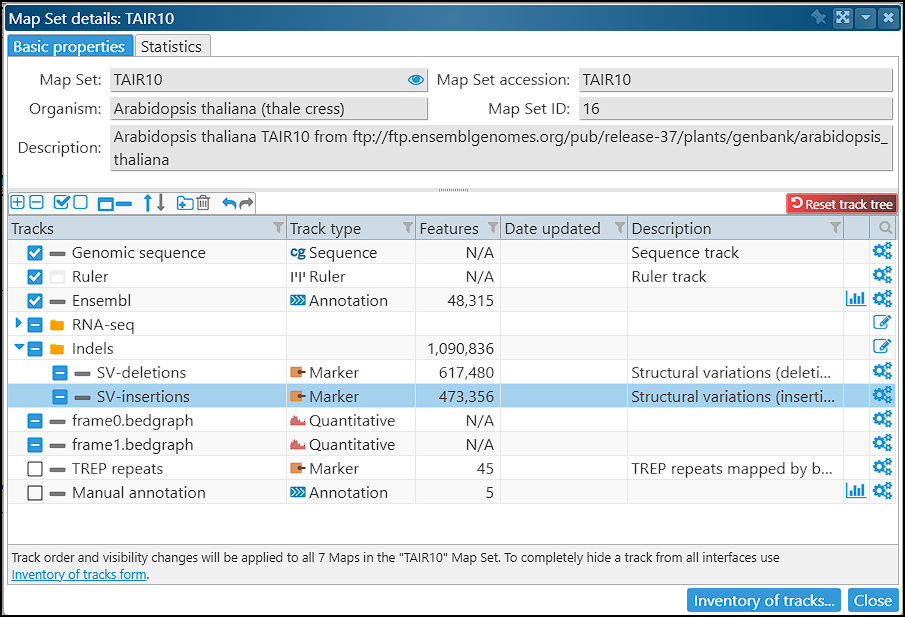
Did you know you can define the default track order, visibility, and collapse state directly from the Map Set details form? You can also organize tracks into folders. The advanced table lists all tracks and lets you sort them by clicking the column headers. Any changes to the track order are applied to the map immediately, and you can always revert them using the Undo/Redo buttons.
One more note: when opening a bookmark, the track order and visibility may differ from your current layout. To prevent accidental rearrangement, track dragging is disabled on maps opened from bookmarks. If you want to restore your preferred track tree layout, simply click the Reset button or reopen the map.
Automatic track scaling has also been improved. In the system settings, you can define the default height for annotation and BAM tracks. The program will then adjust feature thickness dynamically based on how many gene models or reads appear in a stack. When only a few features are present, they are drawn at full thickness; when the track becomes dense, the features are automatically compressed. As soon as you drag a track’s edge, automatic scaling switches to manual mode, giving you full control over how features are rendered.
Two practical tips:
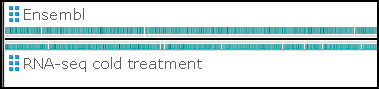
If you are displaying multiple maps and want to reduce the height of annotation tracks, simply drag the track’s edge to compress it. Initially, a two‑strand track will shrink the features while keeping the strands separate. After a certain point, the strands will merge, and continued dragging will compress the gene model glyphs until the entire track is only a few pixels tall.

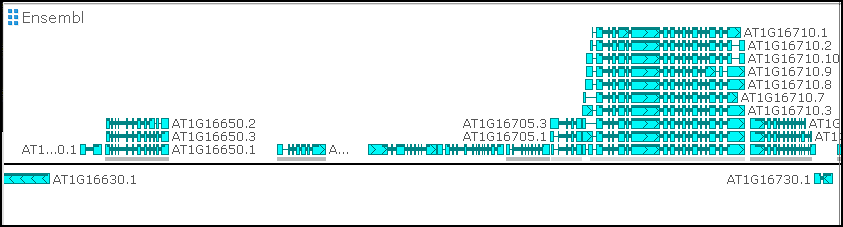
Dragging the track edge in the opposite direction increases the track’s height and expands it to reveal alternative splicing models.